
Create a Lasting Memory with Our Valentine’s Day.
This easy Valentine’s Day heart activity is perfect for little shape-loving keiki. To make a heart suncatcher you will need:
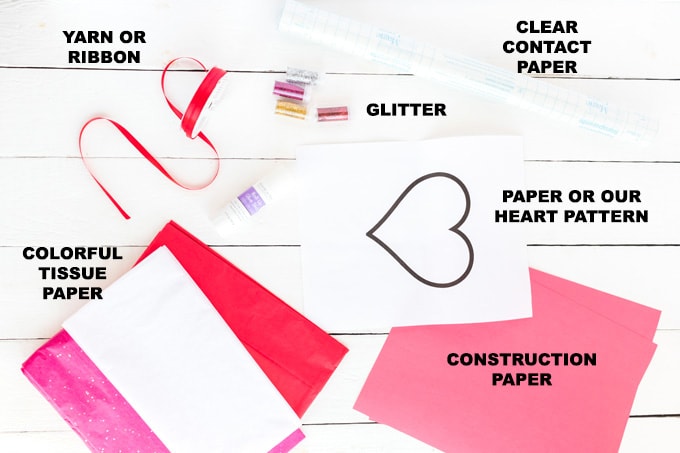
Craft supplies:
- Clear contact paper
- Tissue paper (pink, red, light blue, purple)
- 1 sheet of 8 1/2×11″white paper
- Yarn or ribbon for hanging loop
- Optional: 2 sheets of red construction paper
- Optional: glitter in color of your choice
Helpful crafting tools:
- Scissors
- A large piece of cardboard (should be at least 12×12,” to tape your project to while making it)
- Black marker
- Ruler
- Blue painters tape or low tack tape
- Optional: Hole punch
Helpful Project Information
- Age Level: 8-12 years old. Can be modified for kids ages 3-8 with steps 1-4 being prepped ahead of time. Kids can start on step 5 and may need help with step 6.
- Mess Factor: Glitter (optional), small pieces of tissue paper
- Level of Difficulty: While the tissue paper designs are easy to create, the contact paper can be a little tricky and there is a lot of scissor cutting.
- Time to Complete: 30-45 minutes, plus 20 minutes for drying time if adding the construction paper frame.
- Cost Estimate: Price-per-project ranges between $0.45-$0.99 depending on the price of contact paper, size of suncatchers and materials you have on hand.
Crafting Tips for this Heart Suncatcher:
- Use tissue paper from your stash or grab some from the dollar store.
- You can use whatever colors you’d like, we suggest Valentine colors like red, purple, light blue, or pink.
- If prepping steps 1-4 ahead of time, give yourself 20-30 minutes depending on the size of your group.
- In a group setting it might be easier to have everyone make the same sizes. Photocopy our heart pattern and hand out those sheets so everyone has their own.
- To simplify this project, work in smaller sizes and have each person make 2-3 smaller (3-4″) suncatchers instead of 1 big one. Contact paper is easier to handle in smaller sizes. Cut your white sheet of paper in half and create the heart designs on that. Adjust your contact paper size to fit.
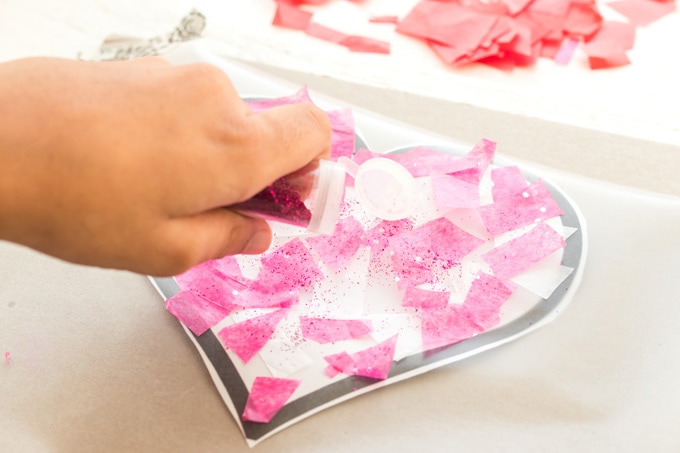
- For some sparkle, add a light sprinkle of glitter when creating the tissue paper designs! Try cutting out some tissue paper hearts to use in your designs as well.
- Younger kids may need your help. The contact paper can stick together quickly and unexpectedly. If you end up with bubbles or folds, use the smooth side of a pen, or handle of the scissors and gently burnish down the contact paper working from the center outward.
Crafting Tips for this Heart Suncatcher:
- Use tissue paper from your stash or grab some from the dollar store.
- You can use whatever colors you’d like, we suggest Valentine colors like red, purple, light blue, or pink.
- If prepping steps 1-4 ahead of time, give yourself 20-30 minutes depending on the size of your group.
- In a group setting it might be easier to have everyone make the same sizes. Photocopy our heart pattern and hand out those sheets so everyone has their own.
- To simplify this project, work in smaller sizes and have each person make 2-3 smaller (3-4″) suncatchers instead of 1 big one. Contact paper is easier to handle in smaller sizes. Cut your white sheet of paper in half and create the heart designs on that. Adjust your contact paper size to fit.
- For some sparkle, add a light sprinkle of glitter when creating the tissue paper designs! Try cutting out some tissue paper hearts to use in your designs as well.
- Younger kids may need your help. The contact paper can stick together quickly and unexpectedly. If you end up with bubbles or folds, use the smooth side of a pen, or handle of the scissors and gently burnish down the contact paper working from the center outward.
How to Make a Heart Suncatcher
- Cut the tissue paper into 1/2-inch pieces and shapes. Place piles of tissue paper within easy reach on the table.
- Draw your heart design (or use our heart pattern) on the white paper, using the black marker.
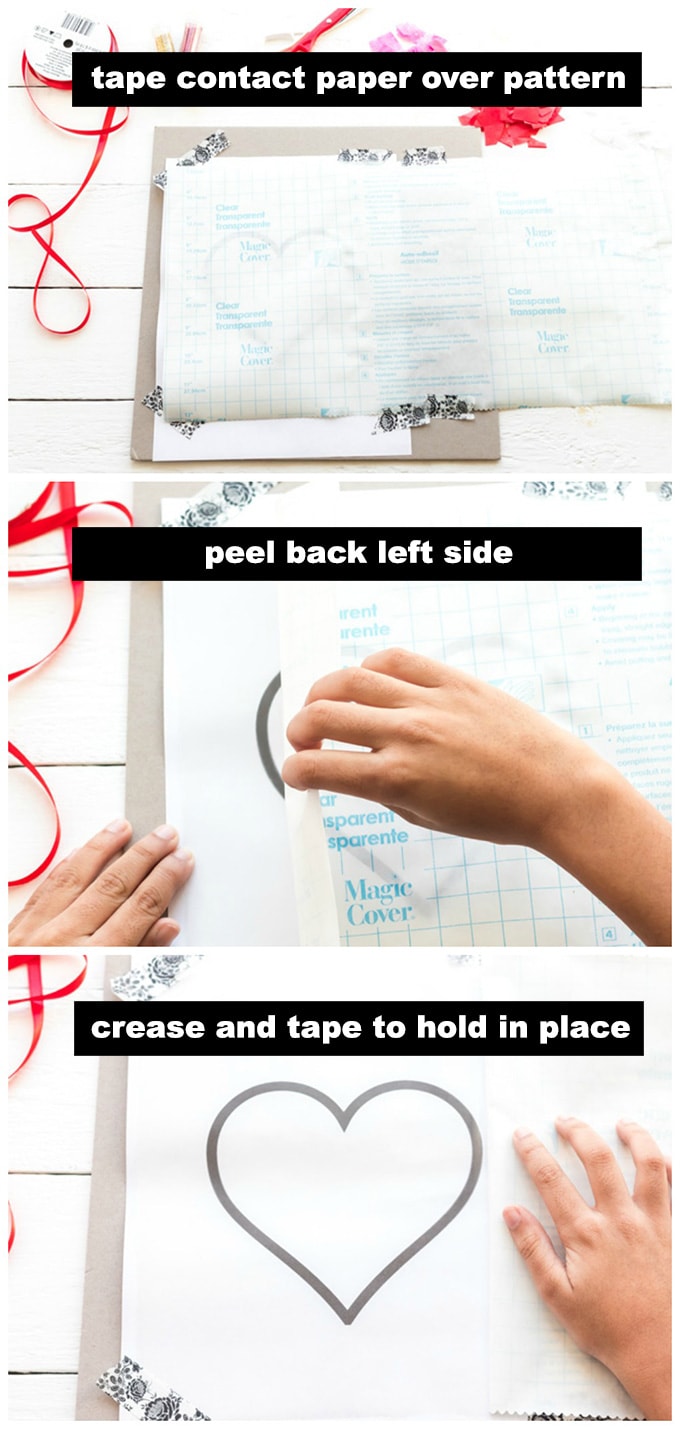
- Measure/cut a piece of contact paper 9×20″. DO NOT peel off the paper yet! Tape the contact paper down on the cardboard piece, paper side up, using pieces of the tape on each corner.
- Carefully peel back the left side of the contact paper so the sticky side is exposed and fold the paper over the right half of the contact paper. Add a piece of blue painters tape to the top and bottom at the centerfold, on the left side of the fold (so you are putting the tape on the sticky side). Then slide the white paper with your heart design under the left side and use this as your guide to create your tissue paper hearts.
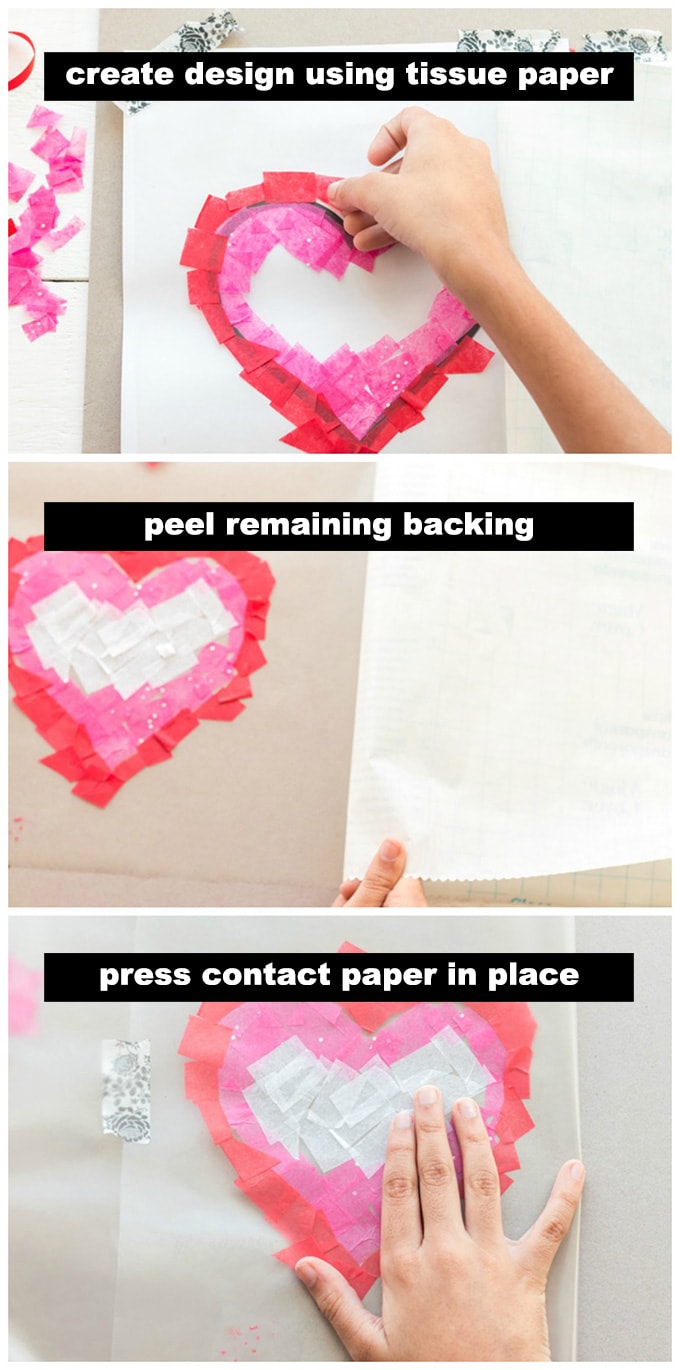
- Design the suncatcher by placing the tissue paper pieces on the sticky contact paper within the heart shapes. You can overlap tissue paper pieces, and it is okay to have small areas where there is no tissue paper. It is also okay to go outside of the lines of the heart.
- Once your design is complete, slide the white paper out from under the contact paper and set aside. When children are done decorating, peel the backing off the right side of the contact paper and fold it over to the left, sticky side to sticky side. This will sandwich the tissue paper design between the contact paper.
- Cut out the heart shape designs from the white paper. Position those on top of the tissue paper designs to use as a guide for cutting the heart shaped suncatchers.
To add a construction paper frame and yarn/ribbon hanger:
- Place the ends of your yarn or ribbon on the left and right side of the heart and glue in place.
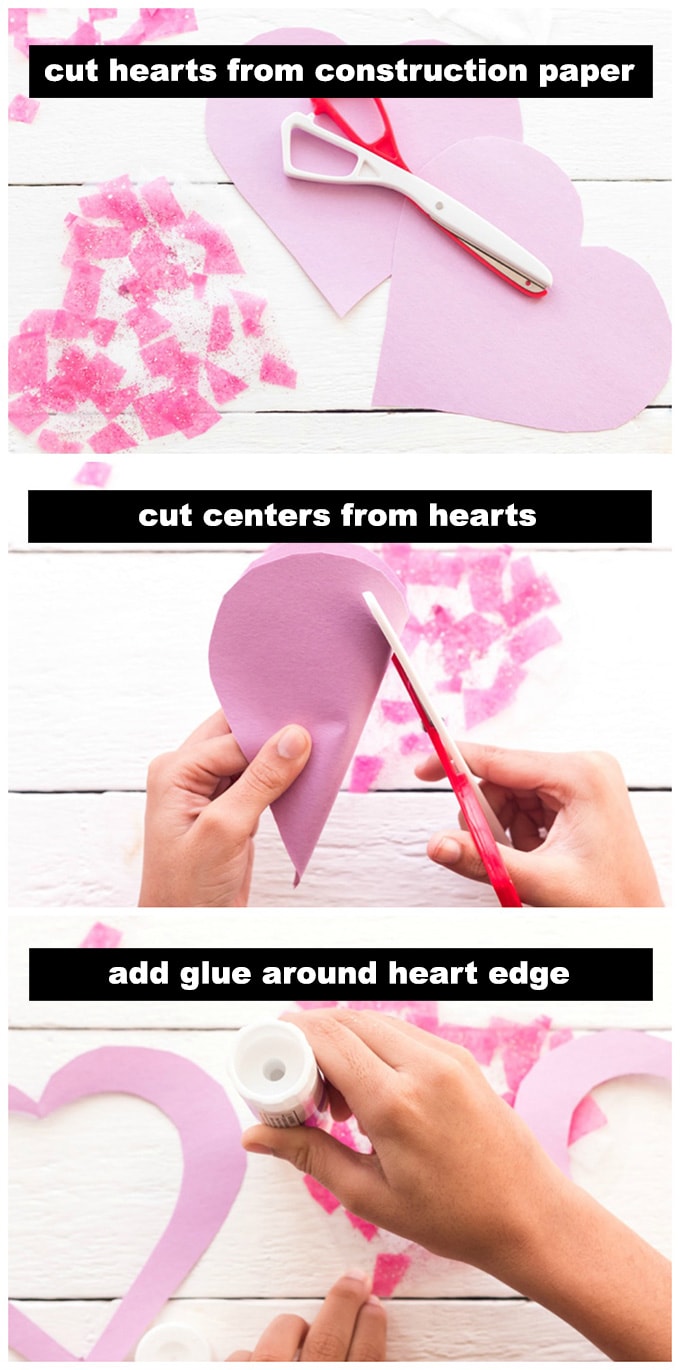
- Trace the white paper heart shapes onto 2 pieces of construction paper.
- Cut out the heart shape, but cut it a little larger than your traced shape about 1/2-inch larger.
- Cut out the center of each heart to create the heart-shape frame.
- Trace the white paper heart shapes onto 2 pieces of construction paper.
- Cut out the heart shape, but cut it a little larger than your traced shape about 1/2-inch larger.
- Cut out the center of each heart to create the heart-shape frame.
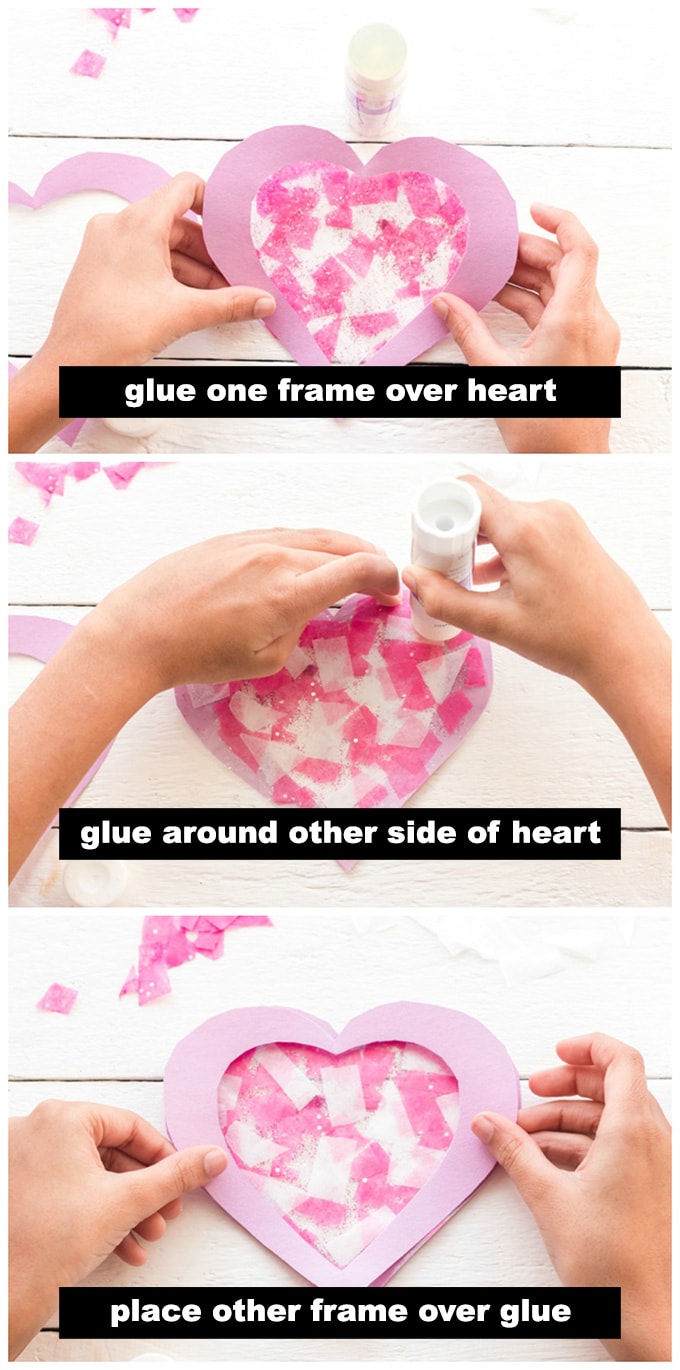
8. Use the glue stick to coat one side of a frame in glue and place sticky side up on the table.
9. Position your tissue paper design on top of the frame.
10. Coat the second frame with your glue stick then glue down over the top of the tissue paper design, sandwiching them together.
Optional: You can also hole punch one hole on the left and right side of the heart and tie the yarn/ribbon through the holes to create a hanging loop.